How to Custom Spray-Paint an Espresso Machine
by NPB Studio Artist Reed Henning
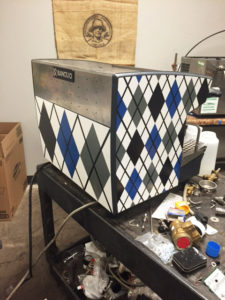
Truebrew Outfitters, a craft coffee distributor, challenged Nancy Pochis Bank Art Studio to add some life to an old, somewhat neglected espresso machine by artistically painting the side and the back panels. We had never painted an espresso maker before, but we figured that we are experienced, creative and talented mural artists and we could paint anything. (If you are sensing overconfidence, you are correct…read on.)
The old Rancillo espresso machine was heading to home office of The Graduate Hotel chain. The Graduate Hotels’ headquarters looks a lot like their hotels–an eclectic mix of vintage furniture, pictures, patterns, and colors. They describe it as “shabby chic” and we described is as 1970’s Ralph Lauren mixed with a classic Ivy League collegiate style (e.g. Love Story with Ryan O’neal & Ali McGraw).
How we approached this challenge:
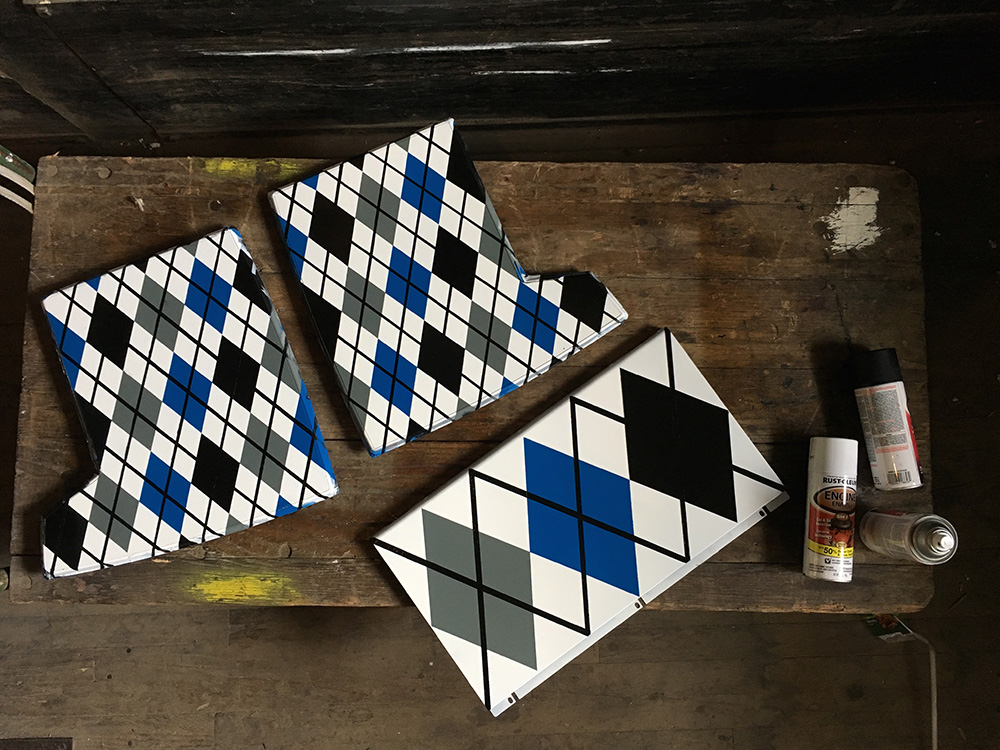
We sketched out several ideas for painting the panels, and brainstormed on how to create a cohesive image that would wrap around the entire machine. There were a couple constraints to address before starting. First, espresso machines get extremely hot, so we needed to use a paint that wouldn’t melt or burn. Second, we wanted the machine to fit in with the “vintage Ralph Lauren” decor of the office. We sent several idea sketches to Truebrew and The Graduate, and they approved the concept of painting the entire machine in a blue and gray argyle pattern.
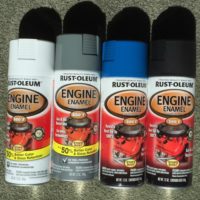
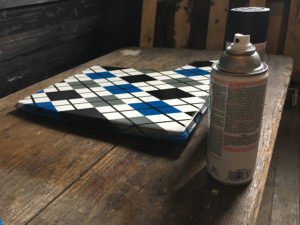
Now that our concept was established, we needed to figure out how to execute the design with a paint that could handle extremely high temperatures. Some quick research led us to High Heat Engine Enamel Spray Paint from Rustoleum. Here’s where our next challenge arose: The argyle design consisted of clean lines, sharp corners, and precise shape measurements that are nearly impossible to achieve with freehand spray painting. We considered making a stencil, but agreed that the lines would not be clean enough as spray paint would leak through the cracks in between the stencil and metal. After some deliberation, we decided to use painter’s tape to seal off each individual shape, and paint each color separately. The tape would give us the cleanest, most precise lines, with absolutely no overspray.
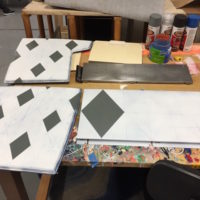
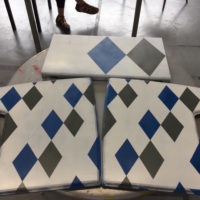
First we sprayed the panels with several coats of Automotive Engine Primer, let that dry for a day, and then applied several coats of white as our base background color. After sketching the pattern on to the primed white panels, we taped over everything but the diamonds that we wanted to be blue. Then we sprayed over the exposed areas, let it dry for a few hours, and removed the tape to reveal the clean cut blue diamonds. We then repeated this process; taping off and spraying each color separately and leaving each color to dry for 24 hours before taping for the next one. Our pattern included blue, gray, and black diamonds. After all the colors were finished, we taped off the line pattern overlay, and painted it black to finish the project. After everything dried, we sprayed on several layers of clear coat to ensure that the artwork was durable

Throughout this process, we learned a lot about creating artwork using only spray paint and tape. Overall, the most important lesson we learned is that even small mistakes can be major setbacks. We found out the hard way that minor flaws due to overspray, incorrect taping, or rushed work can revert a nearly completed project back to the first step.
Here’s what we learned:
- Tape carefully: The tape is half the battle with a project like this. If your tape is not sealed tightly and securely to the surface, paint will spray through the cracks and under the lines. You will lose your clean shape lines, and then have to go back and repaint whatever areas were affected. Going back and repainting and fixing these errors is extremely time consuming because each layer of paint should be dried for several hours before applying tape to them again.
- Use high quality paint and tape: Cheap brands of spray paint and tape just don’t work well or look good. Cheap, generic brands of spray paint that only cost around a dollar per can are diluted, hard to use, and the colors will not hold up over time. Cheap tape won’t give you clean lines. Also, make sure you use high quality primer and several layers of a high quality clear coat at the end of the project. The primer will ensure that your colors stick and last long. The clear coat will give your project even more longevity and make it scratch resistant.
- Spray lightly: Spray paint is goopy and drippy. It is not meant to be applied in heavy coats, but rather in several very light layers. To achieve this, always hold your can 10-12 inches away from the surface, and always keep your hand in motion when spraying. Holding the can too close or stopping and spraying on one spot will cause pooling and dripping. Additionally, pooled or dripping paint will not dry properly and start to crack.
- Choose or create a good painting environment: If you have access to a well-ventilated indoor space, use it. We started working outdoors, and realized that the wind made spraying evenly coated layers nearly impossible, and we were losing about half of our paint to the wind. Working outdoors also puts your project at risk to any airborne debris, which will stick in your wet paint like glue. Once we realized that we could work in our well-ventilated freight elevator, our painting time was cut at least in half, we saved a ton of paint, and our layers came out smoother and more uniform. Remember to always wear a mask no matter where you are painting.
- Take your time: This is general and applies to the entire project process. Every single time we tried to rush a step, it resulted in tragedy and rework. When we tried to paint to quickly, the paint pooled and dried horribly. We had to sand it down and start over. When we rushed our taping, the lines did not turn out clean and ended up ruining at least one other color, which we then had to go back and redo. And every time we made one of these mistakes, we not only had to spend the time re-taping and re-painting, but several hours per each color of new paint drying time. The most important thing to take away from this post is that you should take your time and not rush anything. The time we spent on this project grew exponentially because minor flaws required drastic amounts of work to fix.
 Ultimately we had a great time with this project and learned so much about spray paint and a new process of painting patterns. Spray paint is a lot of fun, and far more versatile than we originally thought! We would like to thank Truebrew Outfitters and The Graduate Hotels for the opportunity to work on this project. We are looking forward to using all of our new spray paint knowledge in future projects!